Photographing the Northern Lights Without Rushing the Night
The first surprise in aurora photography is how much of the evening happens before the sky turns green. You choose a viewpoint, learn the shape of the foreground, adjust to the dark, and wait. That quiet preparation is not wasted time. It is what makes the photographs feel connected to a place rather than simply to a phenomenon.
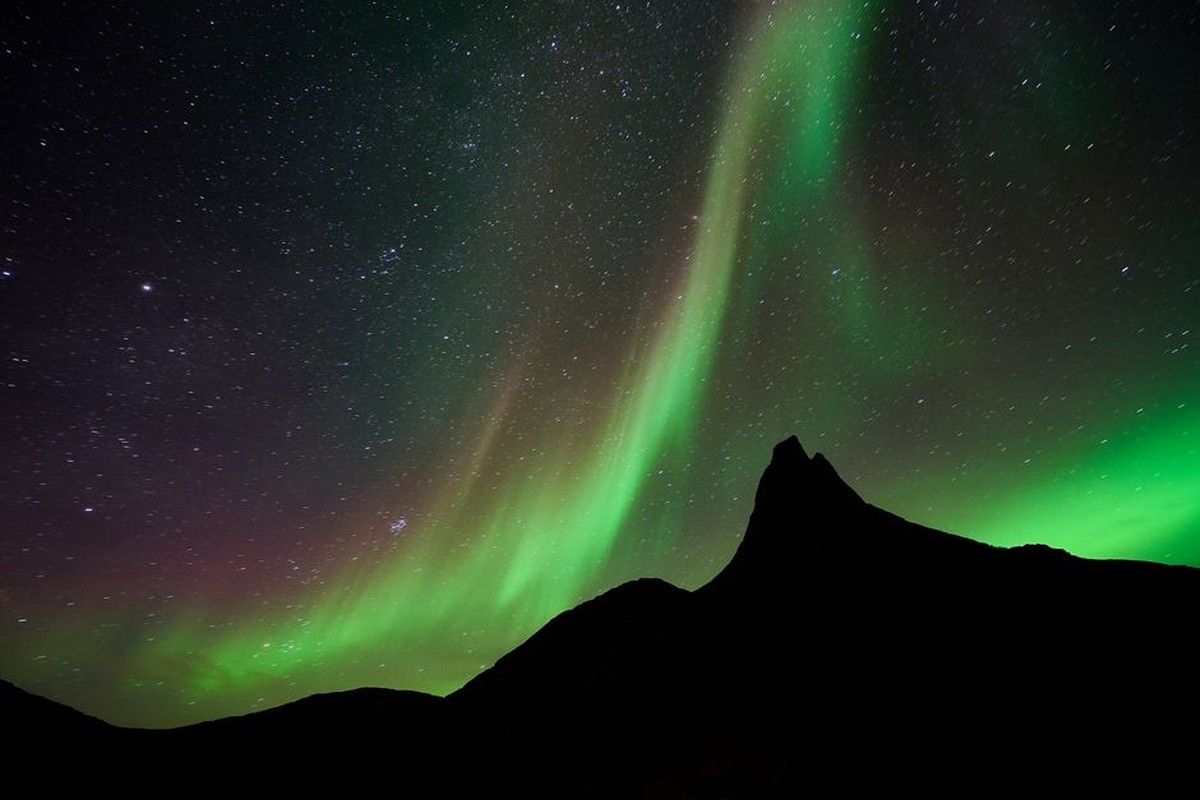
A useful plan starts in daylight. Look for a clear northern view, but also for something that gives the frame depth: a ridge, trees, a cabin, a road, or a dark shoreline. The aurora itself can be spectacular, yet photographs become more memorable when the sky has a landscape to belong to.
Set up before you need to be fast
Cold hands and darkness make simple camera tasks surprisingly awkward. Attach the tripod, choose a lens, and check the battery before the light fades. If your camera allows manual focus, practice focusing on a distant object while there is still enough contrast to see what you are doing.
For a starting exposure, use a wide aperture, a moderately high ISO, and a shutter speed of a few seconds. There is no single correct combination. A faint, slow aurora may need a longer exposure, while a bright, rapidly moving display can look more natural with a shorter one. Review the shape of the lights, not just the brightness of the preview.
Let the movement decide your settings
Aurora can change from a soft arc to fast vertical curtains in minutes. When the structure becomes more active, shorten the exposure so the bands keep their shape. If the sky settles into a broad glow, a little more time can gather colour without making the image feel frantic.
It helps to make small changes rather than chasing settings after every frame. Adjust one variable, take another photograph, and compare. That rhythm keeps you engaged with what is happening overhead instead of turning the night into a technical test.
Composition matters after the excitement starts
When the first strong colour appears, it is easy to point the camera straight up and forget everything else. Take the obvious photograph, then look around. The strongest part of the display may have moved sideways; a reflection may have appeared on water; a cloud edge may now frame the brightest section.
Try leaving more dark space in some images. A small band of light above a quiet landscape can communicate scale better than a frame filled edge to edge with green. Variety also makes the final set feel like a story of the night rather than a sequence of proofs that the aurora appeared.
Keep some minutes camera-free
The most common regret after an aurora trip is not a missed setting. It is realizing that the camera received more attention than the sky. Once you know you have a few frames you like, step away from the tripod for a while.
The cold, the silence, the slow adjustment of your eyes, and the uncertain waiting are part of the experience. A photograph can preserve colour and shape, but those other details are what give the image meaning later.
Good aurora photography is less about reacting instantly than about being ready and then staying patient. Prepare the technical basics early, compose with the landscape in mind, and allow the night to unfold at its own pace.